Professional Nail Drill Machine: How to Choose One and Use It Safely
19 Oct 2026 · 7 min read
Hand filing a full set of extensions can take a long time and tire your wrist. That is why many technicians move to an electric file once their extension and refill bookings grow. A professional nail drill machine can speed up shaping, refills and removal, but only when you choose the right one and use it with care. This guide explains how a nail drill works, which features matter, how the main bit types differ and the safety habits every technician should follow.
What Is a Professional Nail Drill Machine?
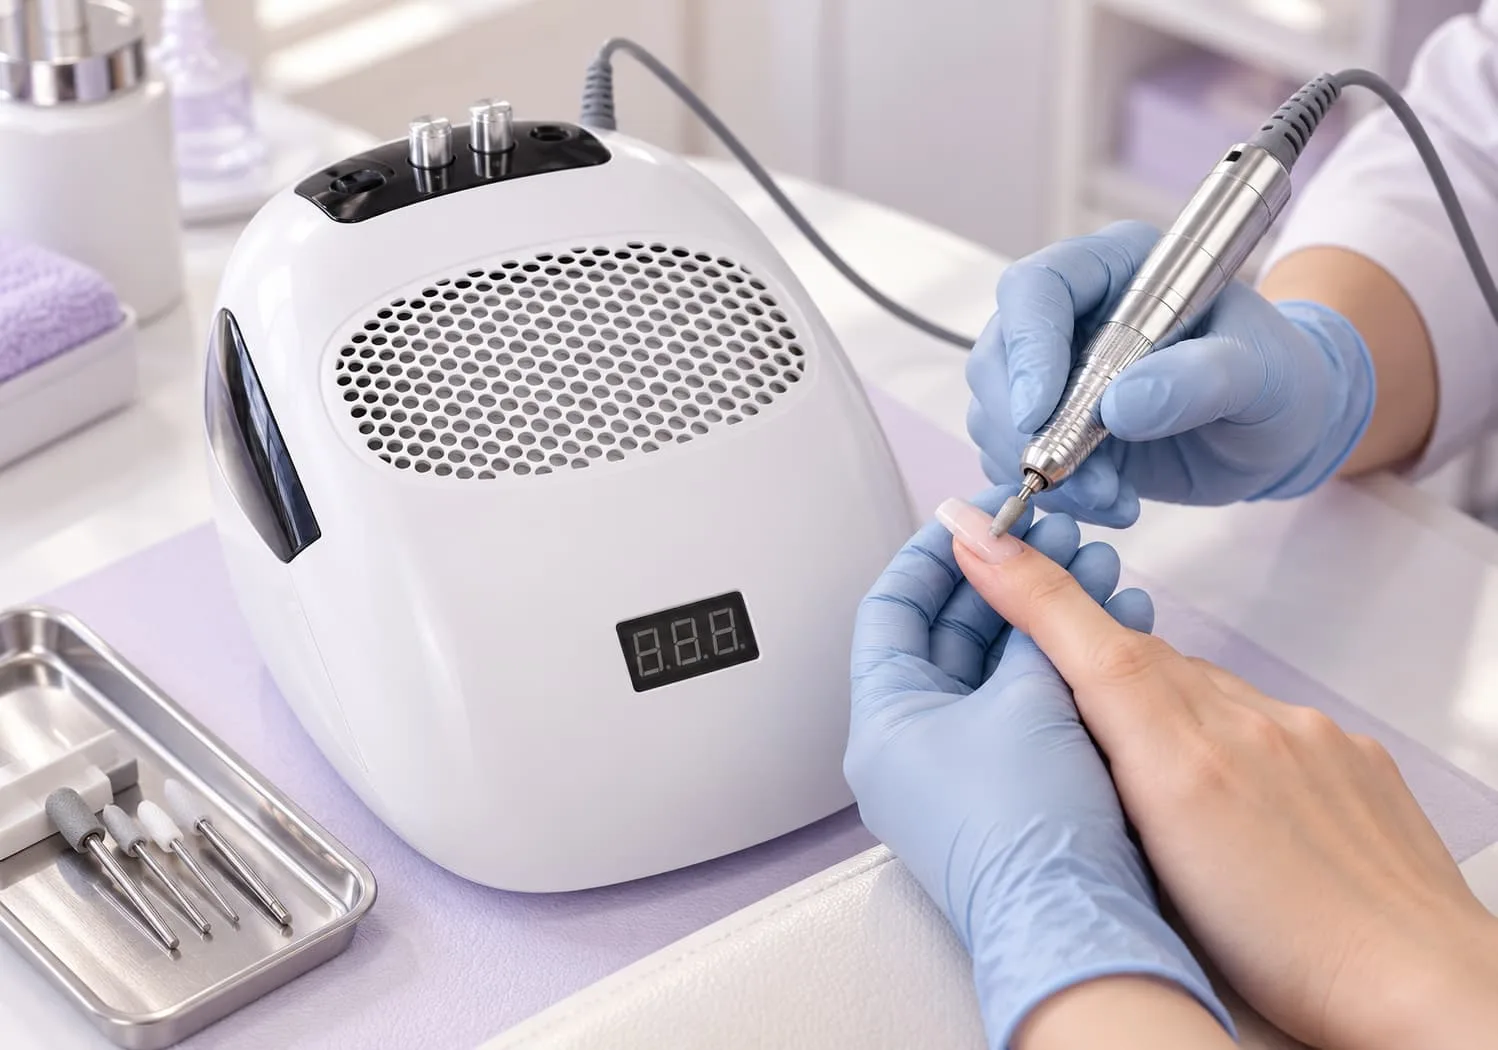
A nail drill, often called an e-file, is an electric tool with a rotating handpiece. You fit a small bit into the handpiece, and the rotation lets you shape, thin, smooth or remove nail products.
Most units have three main parts:
• The handpiece, which you hold and which spins the bit
• The control unit, where you set speed and direction
• The bits, which do the actual filing
Some units also include a foot pedal, and some combine the drill with other functions, such as a curing lamp or dust fan.
Why Technicians Switch From Hand Files
A drill does not replace skill, but it can make skilled work faster and more comfortable. Common reasons to switch include:
• Faster refills. Reducing old product takes less time.
• Quicker removal. Bulk product comes off faster, which helps on busy days.
• Less hand strain. The motor does much of the work that your wrist would otherwise do.
• Detailed work. Small bits help clean up side walls and the cuticle area on enhancements.
However, a drill in untrained hands can cause heat, thinning of the natural nail and injury. Training comes first.
It also helps to be realistic about what a drill will not do. It will not fix a poorly built extension, and it will not make up for weak prep. Think of it as a tool that speeds up good technique rather than a shortcut around it. Technicians who keep this mindset usually get the most value from their investment.
Key Features to Look For
Smooth speed control
You need to adjust speed smoothly and precisely. Different tasks and bits need different speeds. Lower speeds suit careful work near the cuticle and on natural nails, while higher speeds suit reducing product on enhancements.
Forward and reverse
Changing direction helps both left- and right-handed technicians, and lets you work on both sides of the nail comfortably.
A comfortable handpiece
You will hold the handpiece for long periods. A balanced, lightweight handpiece reduces fatigue and gives better control.
Low vibration
Heavy vibration tires your hand and can make clients uncomfortable. It can also make fine work harder.
Bit compatibility
Check that the handpiece accepts standard bits so you can buy replacements easily.
Build quality and support
Look at the materials, the cable and the control unit. Check the warranty and how to reach the seller if something goes wrong.
The Main Types of Nail Drill Bits
Bit type | Common use | Notes |
Carbide | Reducing and shaping enhancements | Cuts efficiently, suits product removal |
Diamond | Detail work and cuticle area on enhancements | Comes in different grits, useful for fine work |
Ceramic | Shaping and product reduction | Popular for its smooth feel |
Sanding bands | Surface shaping and smoothing | Usually single-use, fit on a mandrel |
Buffing bits | Smoothing and final finishing | Use with light pressure |
Choose bits for the task, not by habit. A coarse bit near the cuticle or on a natural nail can cause damage quickly.
Safe Drill Technique: Habits That Protect Clients
Train before you touch a client. Take a proper course, then practise on tips and training hands until your control feels natural.
Keep the bit moving. Holding a spinning bit in one spot builds heat and can cut grooves or rings into the nail.
Use light pressure. Let the bit do the work. Pressing hard creates heat and increases the risk of damage.
Match speed to the task. Start at a lower speed and increase only when the task needs it.
Watch for heat. If a client feels heat, stop, lift the bit and adjust your speed, pressure or bit.
Protect the natural nail. Use gentle bits and low speeds near the natural nail, and never file through to thin it.
Control dust. Use dust collection or a fan, and follow your local health and safety guidance on masks and eye protection.
Clean bits between clients. Remove debris and follow your local hygiene rules for cleaning and disinfecting reusable bits. Discard single-use items like sanding bands.
Is a 3-in-1 Unit Right for You?
Some technicians prefer separate tools. Others want to save space and simplify their desk. Combined units bring several functions into one product.
Viraa Professional offers a 3-in-1 lamp, fan and drill, which combines a curing lamp, a dust fan and a nail drill in one unit. Read the product page for its full details and directions before you buy.
A combined unit can suit you if:
• You work from a small desk or a home studio
• You travel to clients and want fewer items to carry
• You want one purchase to cover curing, dust control and filing
Separate tools may suit you better if:
• Several technicians need to share equipment in different ways
• You want to upgrade one tool without replacing the others
• You already own a curing lamp you trust from the UV lamp collection
A First-Month Practice Plan
New drill users often rush to client work. A simple practice plan builds control and confidence first.
Week 1: Get to know the tool. Learn the controls, change bits and practise holding the handpiece steadily. Work on plastic tips at low speed only.
Week 2: Shape on tips. Practise shaping and reducing product on built tips. Focus on keeping the bit moving and the pressure light.
Week 3: Work on training hands or team members. With permission and supervision, practise refills on colleagues. Ask for honest feedback on heat and comfort.
Week 4: Start with simple client tasks. Begin with bulk reduction on enhancements, and keep hand files for work near the natural nail. Expand to detailed tasks as your control improves.
Keep notes on which bits and speeds work best for each task. These notes become your personal reference and help you train others later.
Common Drill Mistakes to Avoid
Starting at high speed. Begin low, then increase as needed.
Using the wrong bit. A product removal bit on a natural nail causes damage.
Staying in one spot. Constant movement prevents heat build-up and grooves.
Skipping bit hygiene. Dirty bits carry debris and risk cross-contamination.
Ignoring client feedback. If a client flinches or feels heat, stop and adjust at once.
Buying before training. A good drill will not fix poor technique. Learn first.
Caring for Your Nail Drill
Look after your drill, and it will look after your workflow:
• Keep the handpiece clean and free of dust.
• Store the unit in a dry place, away from water.
• Handle the cable gently and avoid sharp bends.
• Replace worn bits, since dull bits create more heat and friction.
• Follow the maker’s care instructions for cleaning and maintenance.
Where the Drill Fits in Your Service Menu
A drill supports services such as extension shaping, builder gel refills and enhancement removal. It pairs naturally with structure products from the nail extension collection. For natural nail work and prep, keep hand tools from the nail tools collection close by, since gentle hand files still suit many tasks better.
Final Thoughts
A professional nail drill machine can make your extension and refill services faster and more comfortable, but it demands training and care. Choose a drill with smooth speed control, forward and reverse, a comfortable handpiece and easy access to bits. Then build safe habits: light pressure, constant movement, the right bit and clean tools.
Explore the Viraa Professional 3-in-1 lamp, fan and drill to see whether a combined unit suits your workspace and your service menu.
Reference Links
Reference | Relevance | Link |
3-in-1 Lamp, Fan and Drill | Viraa Professional combined lamp, fan and nail drill | https://viraaprofessional.com/products/3-in-1-lamp-fan-drill |
UV Lamp Collection | Curing lamps and related equipment | |
Nail Extension Collection | Structure products that drills help shape | |
Nail Tools Collection | Hand tools for natural nail work and prep |